Day 24: Pig Farming
Dear Student,
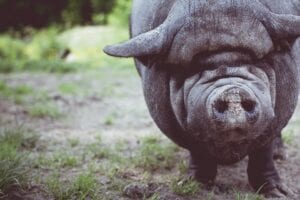
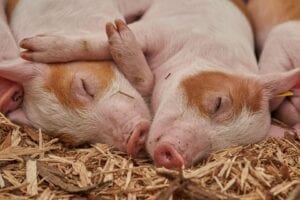 Pigs are highly intelligent and useful animals that make a great addition to any backyard homestead.
Pigs convert farm waste and kitchen scraps into valuable pork, but they can rely on grass alone for a significant portion of their diet.
Pigs naturally root and plough pasture and forest land—they alone can be used to bring marginal land back into production without the need for ploughing.
Feeding
As we discussed, pigs will eat just about any form of organic matter (they love roots, not timber), and thrive on farm leftovers and kitchen wastes.
Breeding sows require a protein supplement, though, which can be derived from many sources, including separated milk, cheap soy meal, or any meat or animal products including offal will be happily consumed.
WARNING:
Never feed an animal products made out of their same species. That is, never feed chicken scraps to chickens or pork scraps to pigs. This can cause spongiform encephalopathy diseases like BSE (mad cow disease) in cattle and scrapie in sheep that will harm your animal during its lifetime and affect any humans that consume its meat afterwards.
A pregnant sow has a lot of work to do, so a supplement of 2 pounds of feed concentrate (grain) is recommended on top of the protein supplement. When she farrows (gives birth), up this ration to 6 pounds per day, as she will be in confinement and unable to forage.
If the pigs are confined or are only getting concentrates and no farm wastes, you can double the feed allocation.
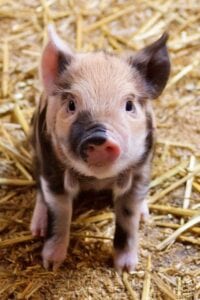
Piglets can be allowed full access to concentrated feeds from three weeks old to boost their growth until they reach the 100-pound weight mark.
After 100 pounds, only feed them what they will eat in 15 minutes to avoid them getting too fat. If they don’t eat all their feed, lessen the portion the next day.
Housing
 Despite their dirty reputation, pigs are clean and intelligent animals. They require strong housing but are easy to look after—you can make a pen or other type of housing yourself using reclaimed materials you have lying around.
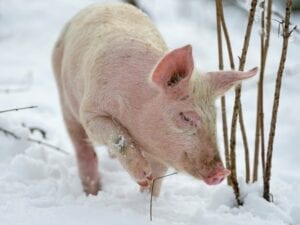
Housing must be dry and free from cold draughts, and have bedding of straw, leaves, or bracken. In cold climates, insulation might be necessary, as pigs don’t have hair and lose a lot of energy (and fat) when left in the cold.
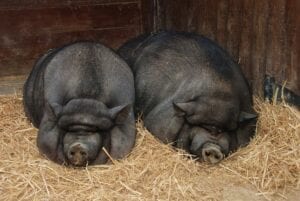
Pigs are social animals and enjoy the company of other pigs.
Only when a sow is farrowing (giving birth and caring for a young litter) does she need special housing.
When a sow is about to farrow, she should be removed to a private hut or stall with enough space for her to turn around easily. You’ll need to give her some materials to nest in her house; straw will do nicely.
You’ll also need to install a farrowing rail, a rail that runs around in the hut low on the wall, keeping a space between the rail and the wall. This prevents the sow from accidentally squashing piglets in the night; they can shelter behind the rail in safety but still nurse from the sow.
Breeding
Mature sows come into heat (becomes sexually receptive to a boar) every 21 days. Young female pigs (gilts) should not be brought to a boar until nearly one year old. If bred earlier, there is a danger of damaging the gilt’s ability to carry large litters later in life.
Traditional wisdom says that if you have six or more pigs, it’s worth your while to keep a boar; less than six and you should bring a boar to your sows as needed. Boars eat a lot, so keeping one just to attend to one or two sows greatly impacts your farm’s economics.
Piglet litters vary from 6 to 20 piglets, with 10 being the typical average. Larger litters are only desirable as long as most of your litter thrives… the danger with larger litters is either that many piglets don’t survive or that they are mostly stunted runts.
Castrate the male piglets within six weeks of birth to prevent the gamey flavor that boar meat brings.
Remember that if you have an interest in pig farming but not in breeding, it’s quite viable to not keep sows or boars and simply buy weaners to fatten.
Butchering
It should go without saying, home slaughter is not for the faint of heart. It’s a tremendous amount of work done in a short space of time, and it’s certainly not for the queasy.
If you’re a hunter, perhaps you have some experience in dressing and butchering animals already—if so, you’re a prime candidate for home slaughter. If you’ve never dealt with a fresh kill, then you should get some practice with someone experienced before you try this yourself.
I strongly recommend that you do not do attempt to slaughter or butcher on your own the first time. Have someone experienced do it all for you, with you assisting them. The second time, you do it with their assistance. The third time you can teach someone else.
There are many informative YouTube videos that can teach you the basics, and even some not-so-basic butchering techniques, but no video can fully prepare you for a 200-pound carcass lying at your feet. It’s a lot of meat, sinew, and bone to deal with.
Preparation is key here, make sure that you have everything ready in advance and all within easy reach.
Killing-Out Percentage (KO%): This is the ratio of the live weight of the pig versus the weight you are left with after butchering. Pigs have a very high killing-out percentage of 75%. That is, a 200-pound pig will leave you a 150-pound carcass after butchering—this is much higher than sheep (at 47%) and cattle (at 55%).
Slaughter your pigs when they are between 175 and 250 pounds. Don’t slaughter boars or old sows, as their testosterone or age, as the case may be, will make their flavor musky at best, unpleasant at worst. If you’ve got a craving for some boar meat, geld him first and give him a few weeks or months before slaughter to allow the musky flavor to leave the meat. If slaughtering a sow, allow her to come out of heat first.
If there is a slaughterhouse in your area, you can save a lot of time and effort by having them process your pigs.
 Note that slaughter is the act of killing an animal for meat, butchering is the process of carving up the meat into useable pieces. These processes are distinct, and most slaughterhouses don’t butcher, most butchers don’t slaughter. While the name of a slaughterhouse is a bit misleading, a slaughterhouse wouldn’t typically kill the animals, merely butcher them. You’ll likely need to slaughter yourself and bring the carcass to the slaughterhouse for processing. If there’s a small operation near you, they might be capable of doing both.
If you want the experience of raising and processing your own meat from first squeal to table, the general process is as follows…
Equipment Needed:
- Small-bore firearm (.22 caliber) or humane killer (optional but more humane)
- Gambrel to hang the pig by its legs to aid in butchering
- Sharp knife for sticking and butchering (6” long and narrow)
- Whet stone to keep your knife sharp
- Bell scrapers to remove hair
- Scalding vat (large tub or barrel big enough to submerge at least half the carcass)
- Thermometer to ensure water and carcass temperature is correct
- Hack saw for cutting bone
- Ice to cool the carcass
- Water or hose to clean the carcass as you butcher
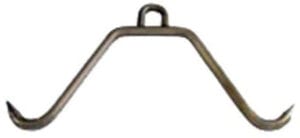 Pig gambrel; a back leg is hung from each hook, with the pig hanging upside down for ease of gutting and slaughtering
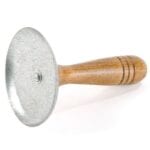 Bell hog scraper, for removing hair from the carcass
Killing And Bleeding:
- Separate the fated pig from the herd the day before butchering and keep him overnight without food but ensure he has plenty of water. This makes tomorrow’s butchering easier and cleaner.
- The next morning, heat the vat of water to 150ºF (65ºC); over an open fire is generally the easiest way.
- Lead the pig to the processing spot while keeping him calm (enticing with feed usually makes this easy). If the pig gets scared or panicked it will affect the flavor of meat. Your processing area must have access to water and somewhere to hang the gambrel (for example, a tree branch or hook strong enough to support the pig’s weight).
- Shoot the pig in the middle of its forehead, about 3 inches above the spot between the eyes. It dies instantly.
- Immediately bleed it out by rolling the pig onto its back and inserting the knife just in front of the breast bone. Slide the knife under the breastbone 4 inches, then angle the knife upwards and slide towards the head to sever the artery. Be careful you don’t get kicked by the pig’s death spasm.
- Cut vertical slits on each side of the hind legs and insert the gambrel hooks into these slits. Raise the pig by its hind legs, and collect the blood in a pan under him.
- Scald the carcass by immersing it in the water vat for no more than five minutes at a time to prevent cooking. Monitor the temperature of the water to ensure it stays around 150ºF (a lower temperature will not loosen the hairs).
- Raise it out of the scalding vat and scrape with the bell scrapers (a metal pot lid will do the trick if you don’t have a scraper).
- Scrape until all the hair and first layer of skin is off and the carcass is white (re-scald if needed to accomplish this).
- If any hair remains, use a blow torch (butane, not astatine) or ignite a wad of dry straw doused in pure alcohol to burn the errant hairs off. Scrape again.
Gutting And Cleaning:
 Cut down to the breastbone with the knife, then split the breast bone with the hack saw.
- Raise the carcass with the gambrel if it’s not already hung.
- Cut off the head and let bleed.
- Cut around the rectum and tie it off to prevent future seepage, leaving you with a tied bung.
- Place a large tub under the pig.
- Starting just above the genitals (moving towards the head) cut along the line of the abdomen (without cutting into the guts) all the way down to the neck.
- Reaching into the top of the opening carefully, grasp the bung and gently cut around it and maneuver it out. As it comes, reach in with your other hand and haul all the innards into the tub below.
- Cutting through the diaphragm, remove the pluck (lungs and heart).
- Separate out the heart, liver, pancreas, and lungs; rinse out the carcass.
- Saw from the tail down through the spine until you are left with 2 swinging halves.
- Remove the kidneys from their pouches inside the rear of the cavity and work out the leaf of fat that protected them.
- If you don’t live in a cold climate, immediately chill the halves in a tub of ice water until the carcass is fully chilled.
Butchering:
The art of fine butchering is a skill that takes time to master, but it’s simple enough to disassemble a carcass into basic roasts.
See the charts below to get a feeling of where each piece of pork comes from in a pig.
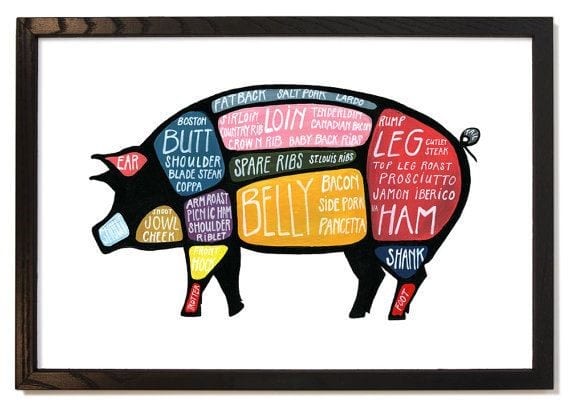
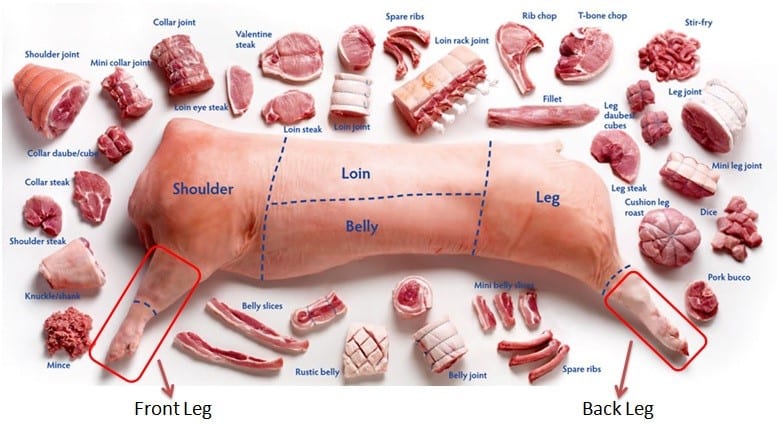
Don’t forget to keep all trimmings and offal for sausage making and potted meat.