Day 37: Food Preservation Part III—Curing
Dear Student,
Curing is the process of using salt (mostly) to preserve meat. A happy accident to this process is that it imparts flavor, and you can select various herbs, spices, and other additions to infuse your meat for specialty batches. So at the same time as preserving your meat, you can create designer meat tailored to your own tastes.
Curing is also a common first step to smoking meat, a process that can both further extend the storage life of the product and further enhance your flavors.
How Does Curing Preserve Meat?
Meat has a high water content that allows bacteria to flourish, which then spoil the meat quicker than in many other foodstuffs. By reducing the water content and injecting salt, the meat is preserved just as naturally as it might have naturally gone bad.
The curing process takes time to work correctly, though. Because of the time lag, you must be careful to keep the meat cool enough to prevent it spoiling before the curing process is complete (44°F/4°C).
Common table salt should not be used; you need kosher salt or course household salt. Salt alone can dry meat out too much for today’s tastes; to counteract this, sugar or other natural sweeteners can be used.
 Saltpeter (sodium nitrate or sodium nitrite) is commonly used as an additional preservative and adds a distinctive red color, however, the consumption of nitrates is linked to health issues. Unfortunately, the consumption of cured meat made without saltpeter is risky, there’s a possibility that not all bacteria have been denatured, so saltpeter use is still recommended by the USDA.
Excessive consumption of cured meats isn’t recommended. The high sodium content is something to look out for if this is a concern for you. (Personally, I’d eat them for every meal!)
Curing Methods
Both of these methods are effective, it’s simply a matter of personal preference on process and flavor.
Dry Curing: The curing mixture is rubbed into the meat directly; this method is a little faster.
Wet Curing: The curing mixture is dissolved in water and tastes less salty afterwards. (This is also known as sweet curing or brining.)
The Curing Process
If you are curing animals you slaughtered yourself, make sure to bleed the animal fully; blood in the meat can affect the process.
Make sure the meat (or animal) is fully chilled (as close to 32°F or 0°C as possible) before you start the curing process—this can sometimes take days for a large animal.
If you intend to store the cured meat or smoke it rather than eating it right away, make sure to remove as much fat as possible from the meat before curing. Also remove any blemishes with a sharp knife on the surface of the meat, and never use anything but Grade-A meats for curing.
Equipment Needed:
 Food-grade container large enough to accommodate the meat.
- Weighing scales to know how much mixture to use and how long to leave it curing.
- If wet curing, a brine pump to inject the brine if needed for large pieces.
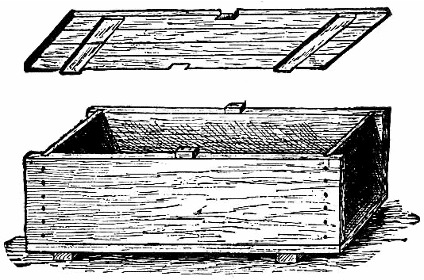
- If dry curing, a curing box (wooden or plastic) with holes in the bottom, plus drip tray. As the salt draws the moisture out of the meat, it drains out through these holes and into your drip pan.
Standard Curing Mix:
8 lbs sal
3 lbs sugar
3 oz saltpeter
Additional seasonings to taste: pepper, onion, garlic, soy, teriyaki, sriracha, honey, sesame, mustard, etc. (optional)
(Premixed curing packages can be bought in stores or online if you prefer to shortcut that part of the process.)
Dry Curing
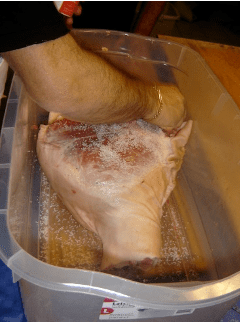 Mix all the ingredients together.
- Rub in one ounce of mixture per of pound of meat. Use lavishly and rub in hard, especially around any bones. Cover every square inch of the meat’s surface.
- Spread a generous layer of the mix into the floor of your (clean) curing box.
- Layer the meat pieces into the box skin side down, largest at the bottom, and spread enough curing mix between each layer of meat and between each piece to prevent any uncovered pieces from touching one another.
- Top with a thick layer of mixture and cover.
- The box must be kept cool, above freezing point but below 39°F (3.9°C) for four days. Modern thermo-controlled boxes are available these days, making this easy for you.
- After four days, replace the salt mixture (now a soggy wet mix) with more of the dry mix you made, repacking it well.
- If any spots look a different color, they might begin to spoil, so rub these vigorously with a plenty of dry mix.
- The meat should cure in this dry mix for two days per pound of meat (of each piece, not total pounds in the curing box), large pieces may need to be repacked again for a third curing, and smaller pieces might take less time.
With a little practice, you’ll figure out how salty you like your meat and how long you should cure it for.

Wet Curing (AKA Sweet Curing Or Brining)
- Use pure or boiled (and cooled) water to dissolve the salt mix. Use 4 gallons of water per 8 pounds of salt.
- Use pieces no bigger than 2 inches thick if you don’t have a brine pump.
- Place the pieces of meat into a container of brine for four days, ensuring that the meat is completely covered. Place a plate over the meat and weigh it down to ensure it doesn’t float and spoil.
- Rearrange the meat every couple of days.
- Never reuse brine, as some bacteria can survive in it and cause spoilage.
- If the brine goes stringy or frothy, dispose of it, wash the meat, thoroughly wash the container, and re-brine.
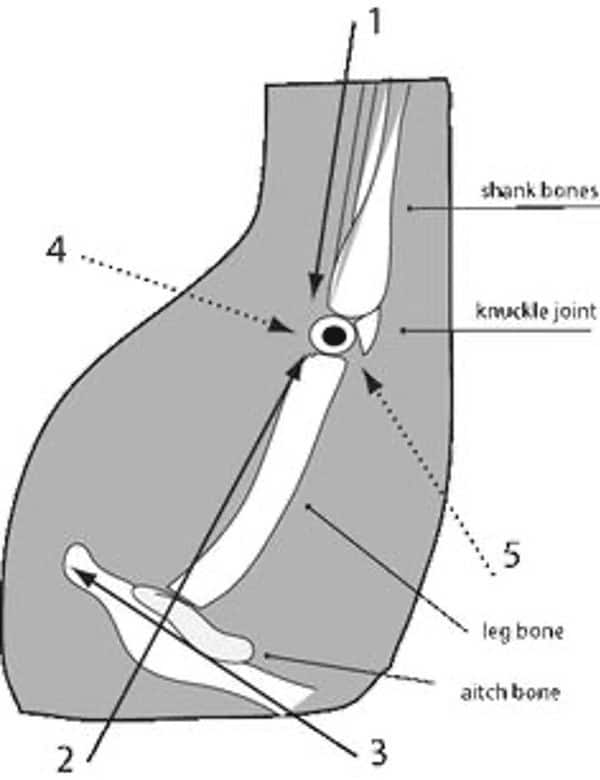
- For all pieces of meat—but especially for pieces larger than 2 inches thick—a brine pump (large syringe with a wide needle with holes along the sides) can be used to pump the brine into the meat, especially into where the bone and joints are. Pump 1.5 ounces of brine for each pound of meat. Inject into the center of the meat until brine begins to escape from the hole you are pumping into, then move the needle and inject another spot. See diagram below for suggested injection locations on a ham or leg roast. Ensure there is no air in the brine pump; air will hasten spoilage not prevent it.
- For very large pieces of meat the brining process can be repeated with fresh brine.
- Once the meat is brined, it should be placed in cool, clean water for up to two hours to balance the salt concentrations.
- After the brine bath, it can be drained and cooked or smoked.
Storing Cured Meats
Cured meat can last months or even over a year if properly wrapped and kept at the correct temperature.
If you wish to store the meat for a while before consumption, ensure it is thoroughly dry, wrap in butcher’s paper, place in cheesecloth or muslin bag, and hang in a cool dry place until it is needed for cooking or smoking.
Air circulation is essential to prevent spoilage, so cured meats must not touch each other or walls. Never wrap with plastic or other non-breathable materials.
Pests And Vermin
Hanging wrapped meat from rope high enough off the ground should prevent animals from getting at your produce.
Insects are attracted to cured stored meats that are hanging but not in a refrigerator. Ham beetles, cheese skippers, larder beetles, and mites are common in the United States, but every geographic area has their own variations.
Some preventative measures against these include:
- Butcher your animals during the cold of winter if you can. The low temperatures usually have pests dormant. Ensure it is cold enough in your storage area to hang the meat safely.
- Sanitize all surfaces in your storage area with soapy water, concentrating on cracks on surfaces. Fill nooks and crannies with wood filler.
- Keeps pets and pests out. Secure and screen the area completely to prevent entrance from outside.
- Use pesticides only when absolutely necessary. Clean any surfaces the meat might come in contact to thoroughly with lots of water afterwards.
- Wrap your meats carefully with butcher’s paper before hanging them in a muslin bag.
Curing Tips
- Experiment with curing mixes and saltiness to suit your taste.
- Never freeze uncooked cured meats; it affects the flavor, appearance, and shelf life.
- Cook cured meats first, then freeze them.
- Previously frozen meats don’t cure as well as fresh meats.
- Keep the meat between 32 and 39°F (0–4°C) to prevent improper curing.
- If your meat freezes during the curing process, thaw it out and deduct the time frozen from the timeframe your curing recipe calls for.